
Archery is one of the most primitive skills that humans developed and it should be something that everyone should try at least once. One of the neat things about archery is that you don’t have to be outdoors to do and it is relatively silent. You’ve might have read many blog posts about outdoor archery, but I am here to tell you all about indoor archery.
As with any hobbies, let’s first get costs out of the way. You can expect to pay $25-$35 for an intro class, which usually lasts an hour. You can get individual lessons for around $60 for 1 person with discounted price as you bring more people. Be aware you’ll need to be on time to maximize the value of the class.
Failing to be on time will reduce practice time and possibly a denial of entry and no refund.
Here’s what you’ll need to know before you loosen that arrow.
Playing Safe: Archery Do & Don’ts
Yes yes. I know, it’s not what you want to hear, but safety is crucial. Although a bow and arrow is an archaic technology, it can be lethal if mishandled and thus you should take archery seriously.
Do:
- Wear closed toe shoes (Not a requirement, but it’s layering)
- Remove cranium accessories (Especially, nose rings, lip rings, ear rings). Keep in mind the string of the bow will be very close to your face when shooting.
- Tuck in any necklace(s) or chain(s) into your shirt.
- Always obey any directions called out by the instructor / proctor. (Failure to do so may result in being removed or banned, so do take it seriously.)
Don’t:
- Don’t ever point your bow and arrow at another person, only aim at the non-living target.
- Do not shoot when someone is retrieving their arrows.
- Don’t wear any clothing with hanging sash that might tangle with the string of the bow.
Additional things to keep in mind:
- Bandage up any open cuts at the fingers, you’ll be drawing from a range of 10-60 lbs of weight on the bow string, so it’s best to patch those up to prevent further tearing.
- Long finger nails may hinder a proper draw, so consider trimming them prior.
Indoor Archery vs Outdoor Archery
In all honesty, there really aren’t a whole lot of distinctions between indoor and outdoor archery.
One of the key difference is factoring the wind when you shoot. Outdoor archery may have strong wind that can blow an arrow of its course, whilst indoors are under a controlled environment and thus it may be be easier to land good shots repeatedly.
Another difference is distance from target, indoor archery is limited by the spacing of the facility and usually the firing line is around 20 yards. However, during your fundamental classes, you’ll be firing at a much closer range between 10-15 yards or less.
How to Shoot a Bow
If you aren’t planning on going to the range, but would still like to learn how to shoot with a bow properly, you’re in luck.
Before you let loose that arrow, you’ll need to determine a few things:
- Right hand or Left hand?
- Which eye is your dominant eye?
- What is your draw weight?
There are many different types of bow such as the recurve bow, compound bow, crossbow, long bow, composite bow, etc.
All of them have their pros and cons and their technological advantage.
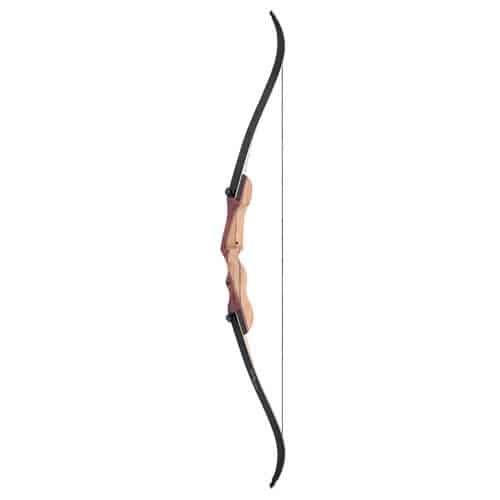
For this post, I’ll just be covering how to shoot with a recurve bow. You’ll most likely be using one if you do plan on doing indoor archery and it looks like this:
Which Hand Matters
You might think you’ll be able to shoot a bow with either hand, while that may be possible, but the bow you use will vary. Unlike a crossbow or a firearm which are symmetrical, enabling the users’ the flexibility of using either hand / orientation, a recurve bow’s handle or grip is particular.
What I mean by this is that the grip of the bow is shaped and orientated differently based on which hand you use to hold the bow.
Your non-dominant hand is the one that will grip the bow while your dominant hand is the one that will draw the arrow and the string.
Look with your Special Eye
10pts to anyone that understood that subheading reference.
To determine your dominant eye is fairly simple, statistically speaking, whichever side your dominant hand is on, that is your dominant eye.
A dominant right hand means your right eye is the dominant one and vice versa for lefties.
However, this is not always the case, some people are cross dominant, meaning their dominant eye is on the opposite side of their dominant hand. People with cross dominant will have to choose to either learn how to shoot with their dominant eye with their non-dominant hand or to shoot with their non-dominant eye, but with their dominant hand.
If you want a very clear indication as to which one is your dominant eye, All About Vision has a great video to determine that.
Your dominant eye is the one that stays open and will be responsible for focusing on the target.
Your Draw Weight
Here’s a table that will help determine your draw weight:
| Archer's Weight | Draw Weight | ||
|---|---|---|---|
| Small Frame (120 - 150 lbs) | 30 - 45 lbs | ||
| Male | Medium Frame (150 - 180 lbs) | 45 - 55 lbs | |
| Large Frame (180+ lbs) | 40 - 60 lbs | ||
| Small Frame (100 -130 lbs) | 25 - 35 lbs | ||
| Female | Medium Frame (130 - 160 lbs) | 25 - 35 lbs | |
| Large Frame (160+ lbs) | 30 - 45 lbs | ||
| Children | Small Frame (70 - 100 lbs) | 10 - 15 lbs | |
| Large Frame (100 - 130 lbs) | 15 - 25 lbs | ||
If a table like this one isn’t readily available, just remember for adults, a round about average to determine your draw weight is to divide your body weight by 4 and round it to the nearest whole number or increment of 5.
Ex:
| Archer's Weight = 100 lbs | Archer's Weight = 130 lbs |
|---|---|
| 100 lbs ÷ 4 = 25 lbs | 130 lbs ÷ 4 = 32.5 lbs |
| Draw Weight = 25 lbs | Draw Weight = 33 lbs or 35 lbs |
To determine children’s draw weight, divide their weight by 7.
Take Aim
Once you have that figured out, let’s actually learn how to shoot a bow.
First draw out an arrow from your quiver, you’ll see that modern arrows will have two of the feathers with the same color and one that’s different.
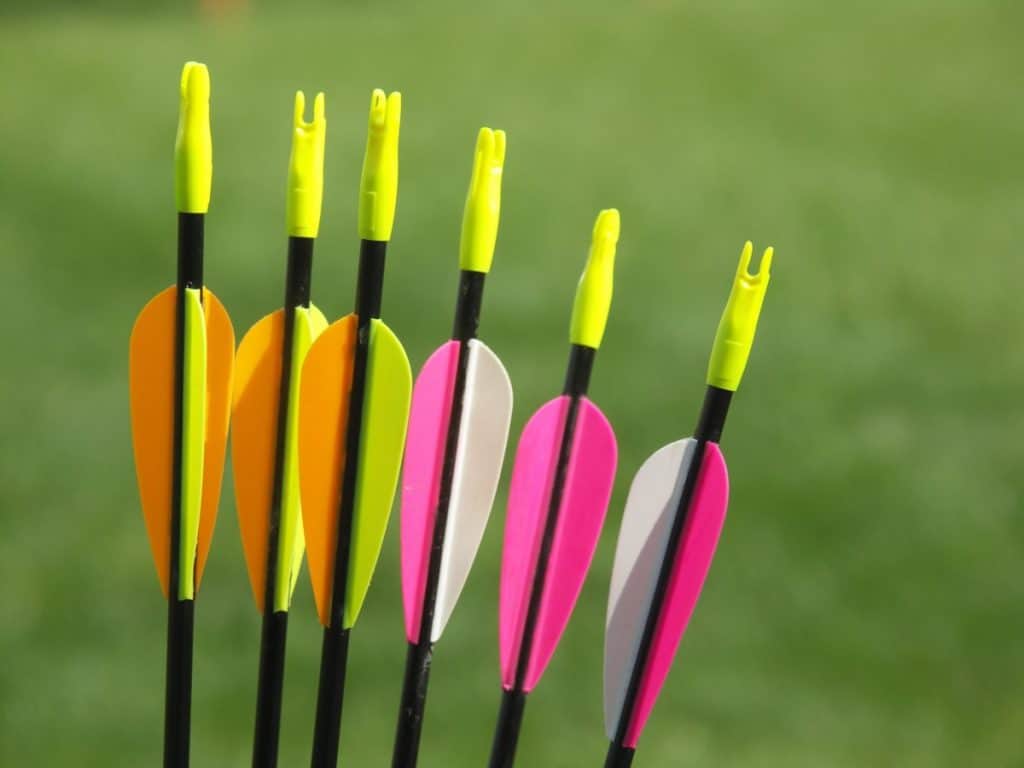
The feather that’s different is called an index feather, it helps the archer to determine how to position the arrow to reduce contact with the arrow rest when shot, giving you a straighter shot.
The odd feather points away from the bow, if you have a hard time remember that just remember: “The odd ones out”.
At the end of every arrow will have a little notch cut out, this is called a nock. You will slide this into the bow string.
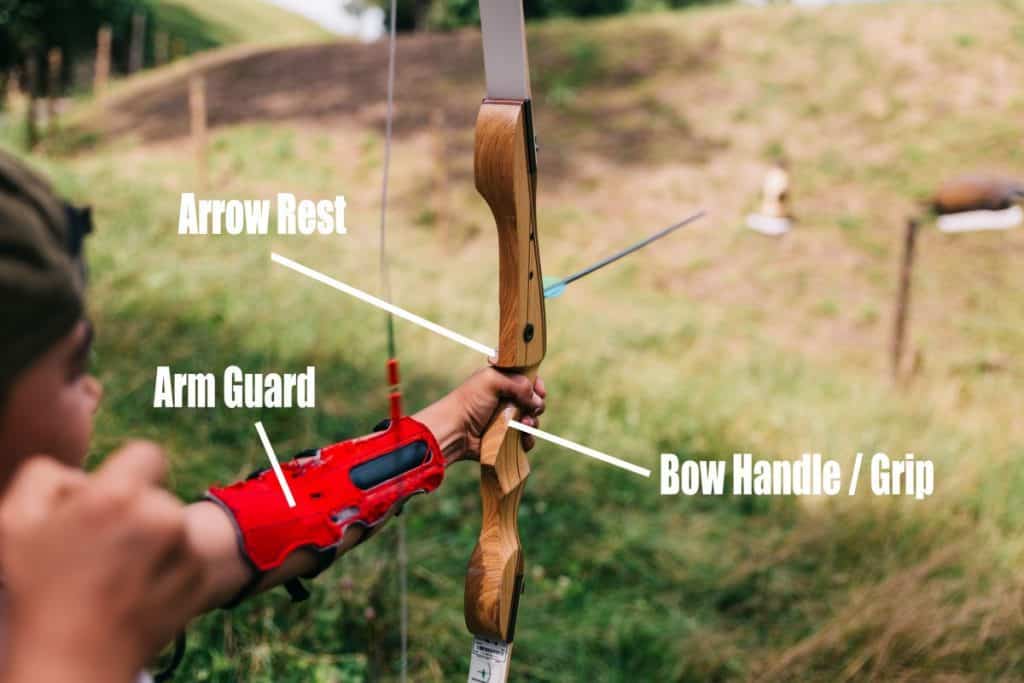
Next, you’ll gentle rest the shaft of the arrow on the arrow rest and pull back on the bow string with your dominant hand.
Archer’s Form
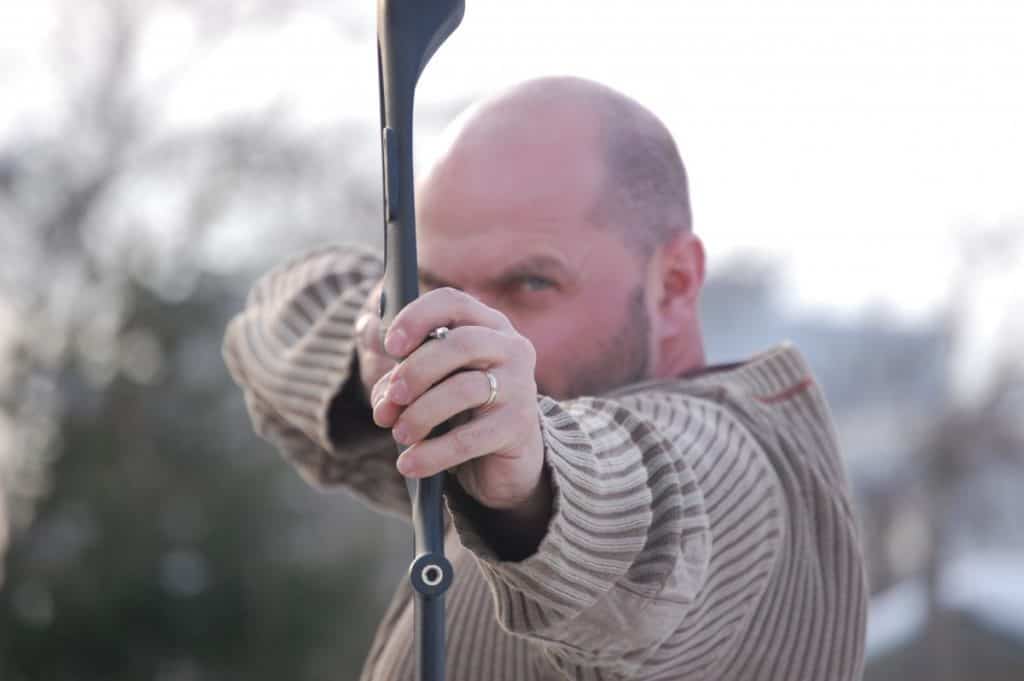
The archer’s form is everything when it comes down to accuracy, but explaining it in words might be hard to comprehend and thus I found a video made by Men’s Journal on how to have a proper form.
Although, they are not the leading source in archery, but the video does a good job explaining it all.
In the video, you might see that he is wearing some protective gears, so let’s talk about a couple of them.
Protective Gears
The two most common protective gears you’ll encounter are the finger tab and the arm guard.
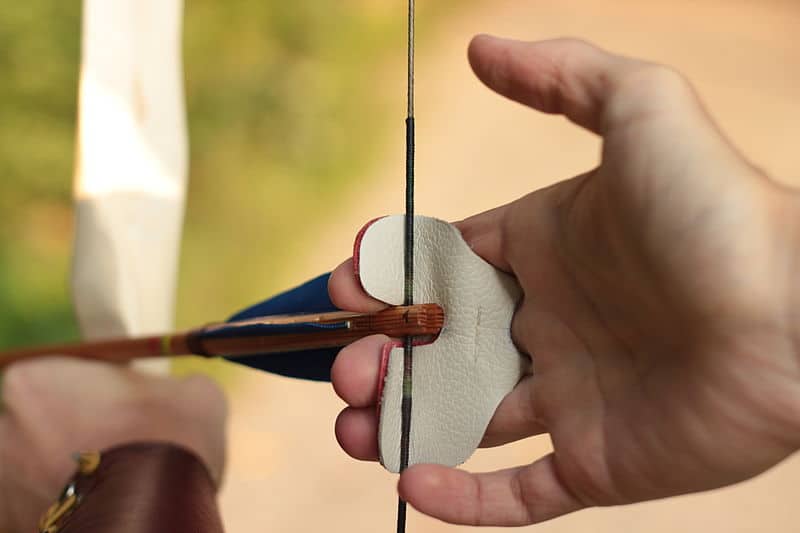
Although, you don’t necessarily need a finger tab, but it’s an absolute game changer to use one, because if you don’t your fingers will hurt like a [Insert Unpleasant Adjective].
A finger tab can run you anywhere from $5 – $50 depending on quality and the material of fabrication.
The one seen in the video is a glove, but it serves the same purpose to protect your hand and fingers when practicing.

Most people will pick up an arm guard after a while of practicing. As the name implies, it protects your arm from the bow string slapping your arm when you release the arrow.
You can pick up an arm guard for as low as $10 with the better quality ones around the upper $60 range.
Personal Gear
If you want to own a recurve bow, you can expect to pay between $50 – $800. With that said, I wouldn’t recommend you jumping on the $800 bow if you’re just starting out. A pricier bow doesn’t mean you suddenly become the grand-master of archery.
You’ll have to master the fundamentals first and $50 bow will get the job done just as well.
Arrows typically cost between $1 to $5 per arrow.
Paper targets of 25pcs will cost around $20, while reusable targets costs around $30-$50.
Now you’re ready to become one of the iconic archers on TV. Remember to rest in between sessions and to not overextend yourself to minimize the risks of injuries. Go out and have fun!